
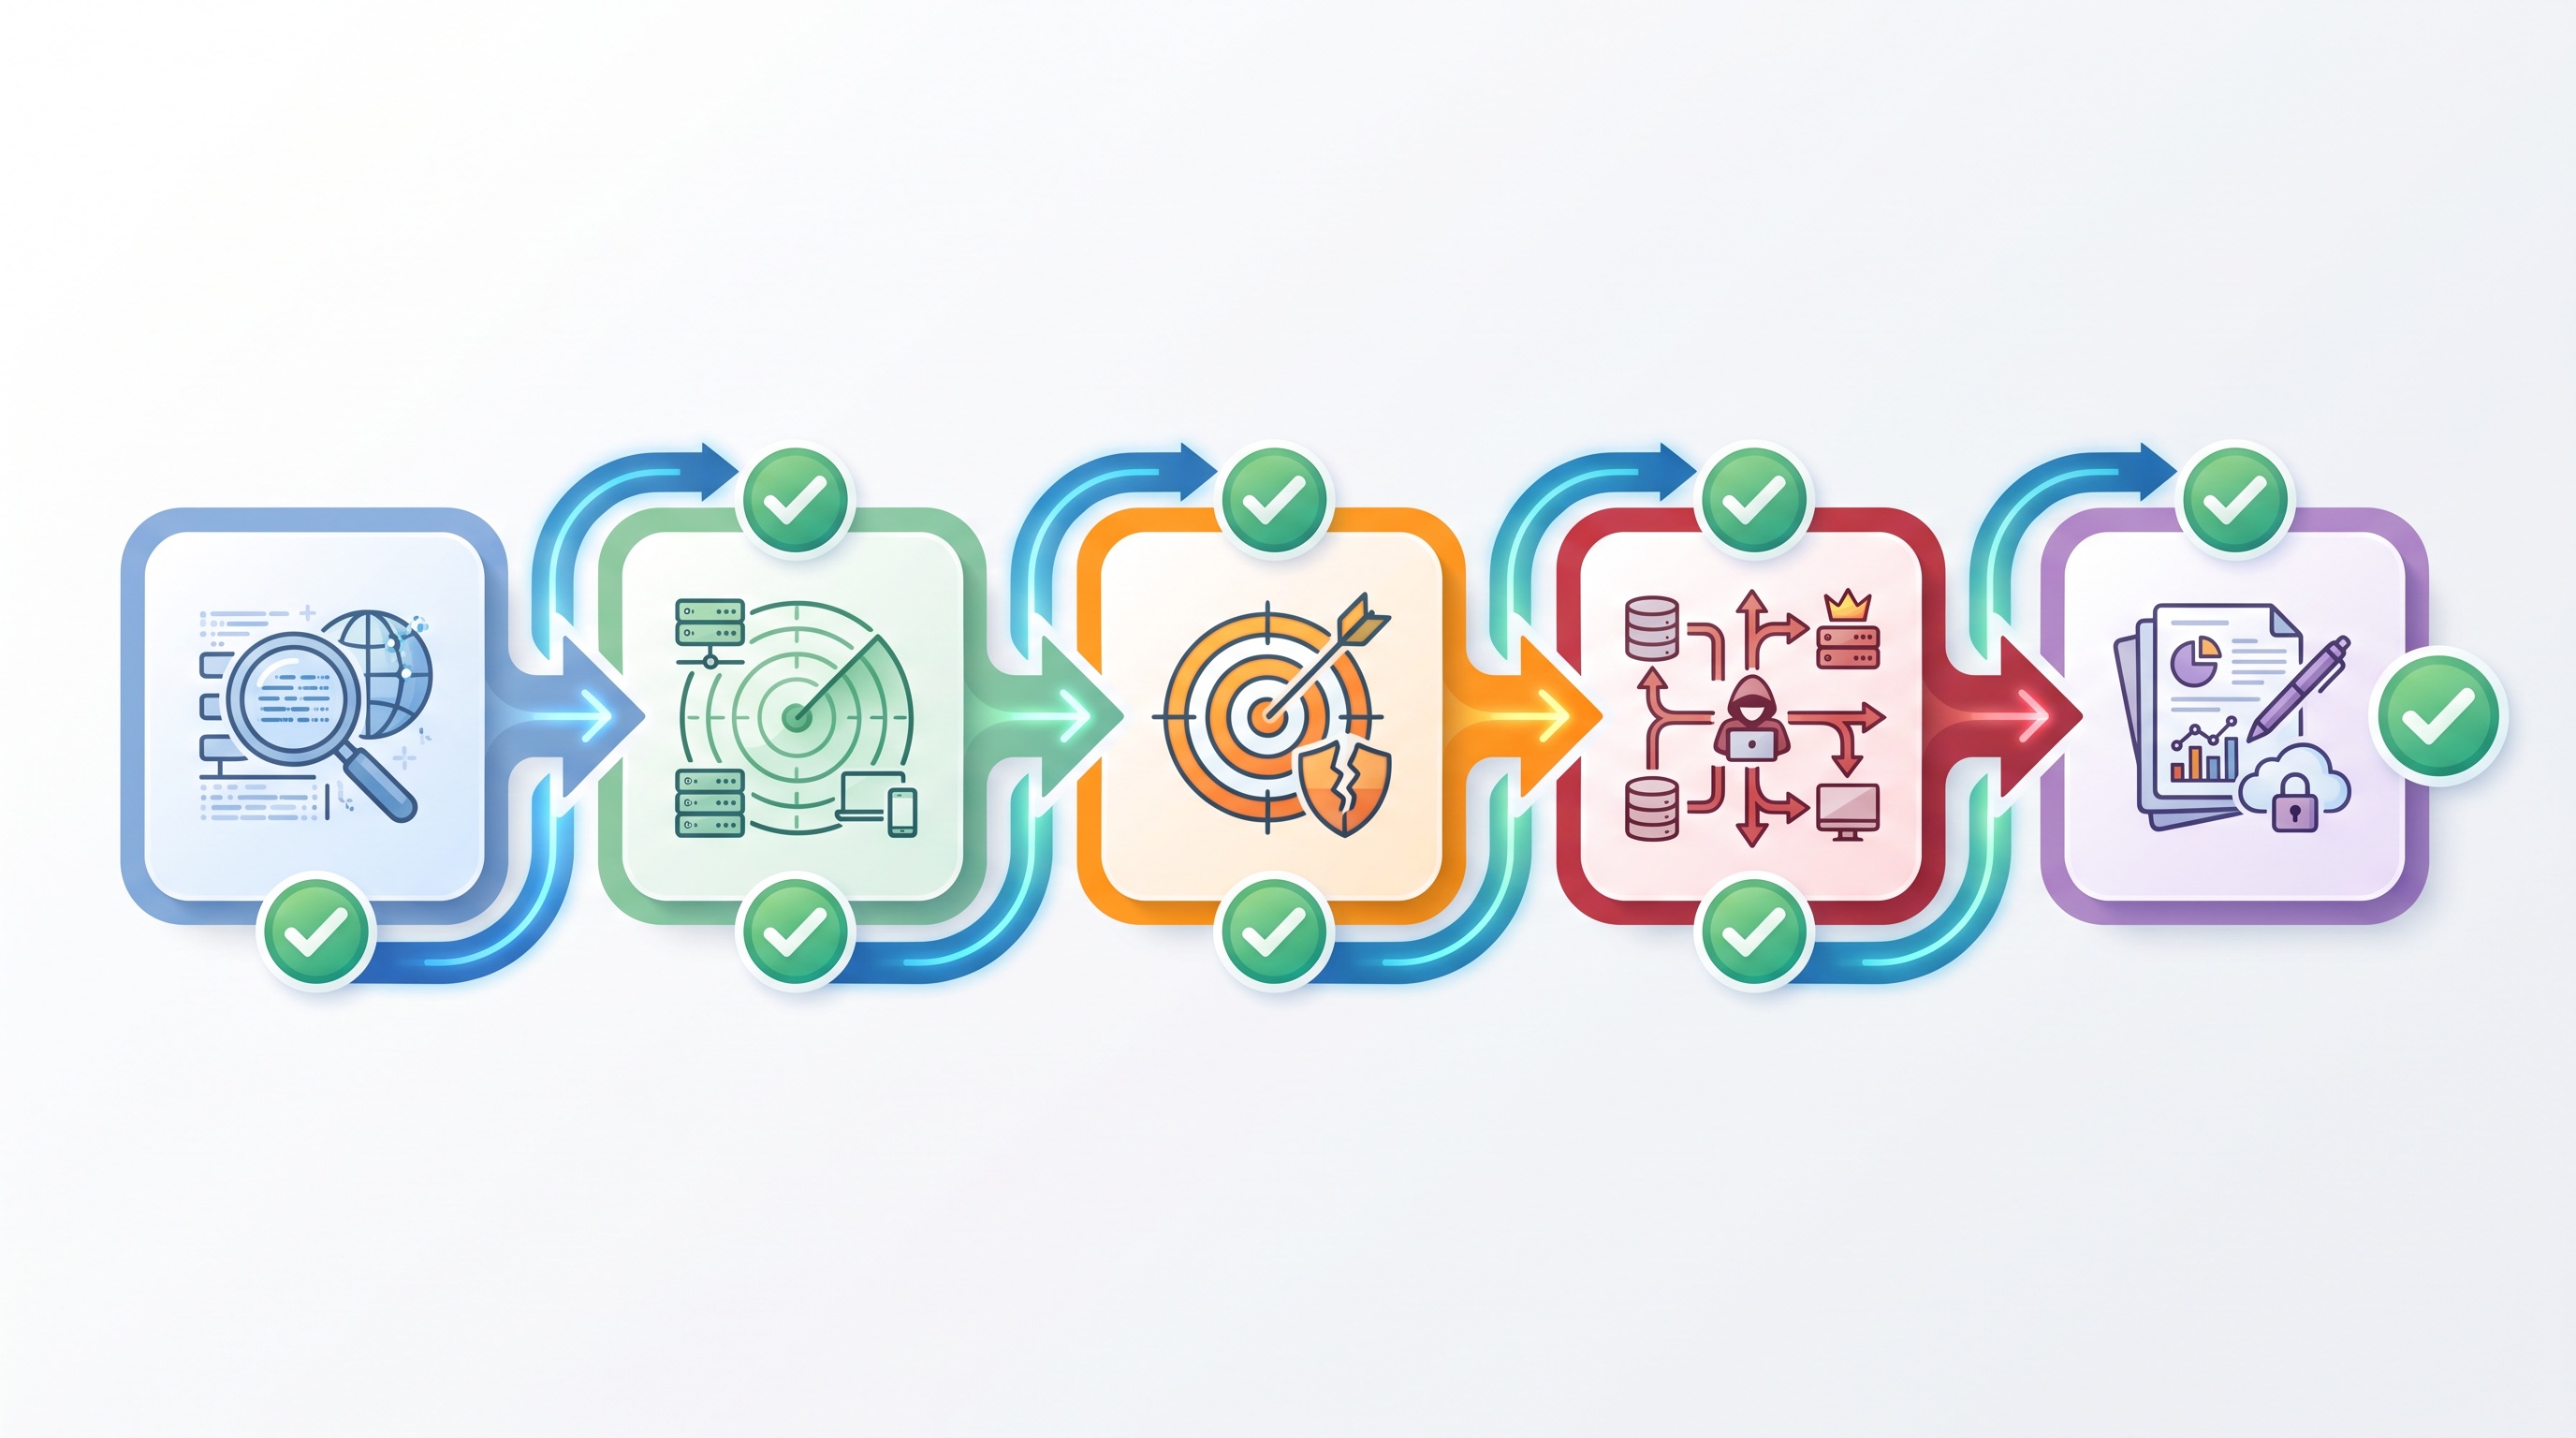
A network pentest checklist is the backbone of any structured penetration test: it ensures you cover every phase systematically, from the first recon scan to the final report, without missing a critical attack surface. Whether you are preparing for a certification like OSCP or CPTS, or running a professional engagement, this guide walks you through each phase in a clear, actionable sequence.
- Why a Structured Checklist Matters
- Phase 1: Reconnaissance
- Phase 2: Scanning and Enumeration
- Phase 3: Exploitation
- Phase 4: Post-Exploitation and Lateral Movement
- Phase 5: Reporting
- How This Checklist Helps With Pentest Certifications
- Frequently Asked Questions
Why a Structured Network Pentest Checklist Matters
A structured checklist prevents the most common failure mode in penetration testing: skipping a phase under time pressure and missing a critical vulnerability. Network pentesting is a multi-phase process, and each phase feeds directly into the next. Skipping enumeration, for example, means exploitation attempts are based on incomplete data, which leads to false negatives in your final report.
A checklist also creates repeatability. Two testers following the same checklist on the same scope should arrive at comparable findings. This consistency is exactly what certification exams and real clients expect. OWASP maintains publicly referenced testing frameworks that reinforce the principle: structured methodology produces reliable, defensible results.
A pentest without a checklist is not a methodology. It is guesswork with a terminal window open.
Phase 1: Reconnaissance
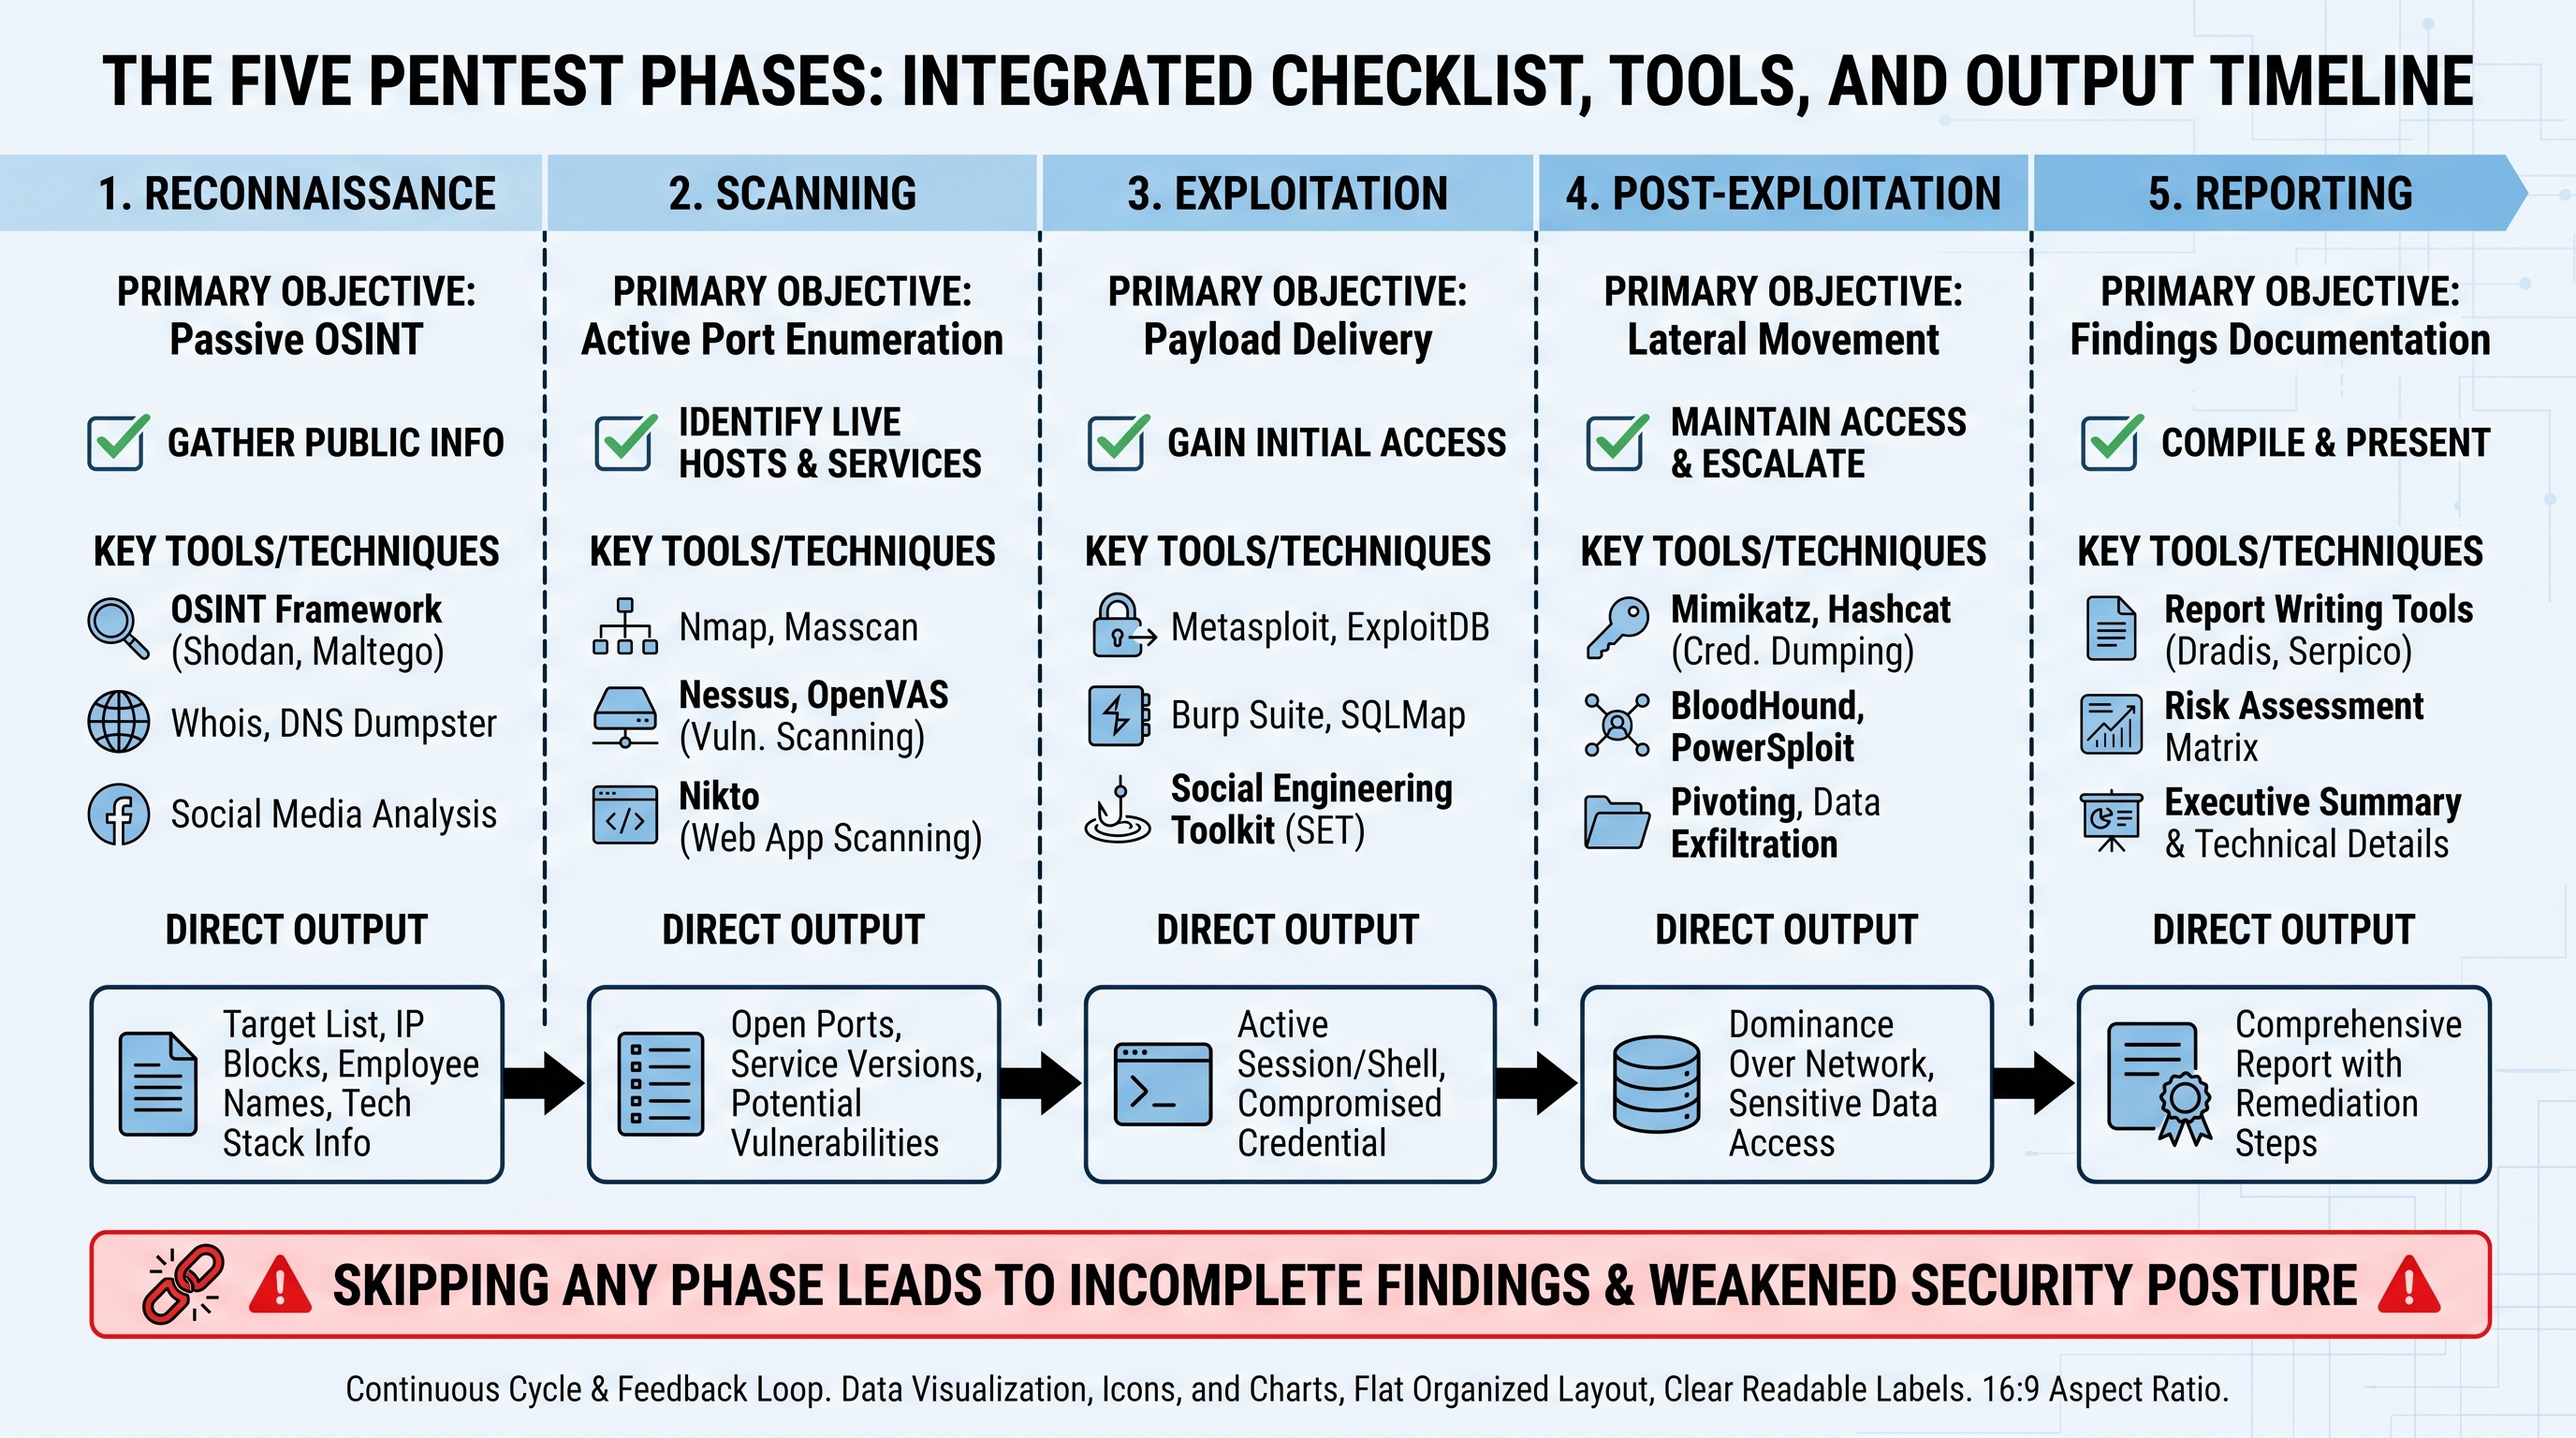
Reconnaissance is the information-gathering stage where you build a complete picture of the target without sending a single exploit payload. Good recon directly reduces time wasted on rabbit holes during later phases.
- Define the scope clearly: IP ranges, domains, and any out-of-scope assets documented in writing before starting.
- Perform passive OSINT: check WHOIS records, DNS history, certificate transparency logs (crt.sh), and LinkedIn for technology stack clues.
- Identify ASN and netblock ownership to map the full network perimeter.
- Enumerate public-facing subdomains using tools like Amass or Subfinder.
- Check for exposed credentials or leaked data in public breach databases relevant to the target domain.
- Document every finding with timestamps and source references before moving on.
Key definition: Passive recon means gathering data without directly interacting with target systems, so it generates no logs on the target side.
Phase 2: Scanning and Enumeration
Scanning transitions from passive intelligence to active interaction with target hosts, revealing live systems, open ports, running services, and software versions. This phase generates the attack surface map you will use throughout the engagement.
- Run a full TCP port scan across the target range (e.g., Nmap with -p- and -sV flags) and save output in all formats for later reference.
- Follow up with UDP scanning on the most common high-value ports: 53 (DNS), 161 (SNMP), 500 (IKE).
- Enumerate service banners and OS fingerprints to identify exact software versions.
- Run NSE scripts for service-specific enumeration: SMB shares, RPC endpoints, HTTP headers, and SSL/TLS configurations.
- Identify domain controllers, file servers, and management interfaces (IPMI, iLO, iDRAC) as priority targets.
- Scan for known default credentials on discovered services before attempting any active exploitation.
- Cross-reference discovered versions against CVE databases to prioritise high-impact vulnerabilities.
Nmap’s default SYN scan (-sS) requires root privileges and is the fastest reliable TCP scan method for large subnets.
Phase 3: Exploitation
Exploitation is the phase where you attempt to gain unauthorised access by leveraging the vulnerabilities identified during scanning. Controlled, documented exploitation is what separates a professional pentest from a destructive attack.
- Prioritise exploits by impact and reliability: remote code execution vulnerabilities before information-disclosure issues.
- Test exploits in a local lab environment first when possible, especially for public CVE PoC code that may be unstable.
- Attempt credential-based attacks: password spraying, default credentials, and hash relay attacks (e.g., NTLM relay via Responder) before launching exploit code.
- Use a phased approach: try the least destructive exploit path first to avoid crashing production services.
- Document every attempt, including failed ones, with timestamps, commands, and observed responses.
- Capture proof screenshots and command output immediately after gaining access, before taking any further action.
Important: Any exploit that could cause a service crash or data loss must be explicitly approved in the rules of engagement before execution.
Phase 4: Post-Exploitation and Lateral Movement
Post-exploitation determines the real-world impact of an initial compromise by measuring how far an attacker could move through the network from a single foothold. This phase is where certifications like OSCP and CPTS place heavy weight on demonstrating depth.
- Enumerate the compromised host: local users, running processes, installed software, network interfaces, and scheduled tasks.
- Check for stored credentials: browser saved passwords, configuration files, environment variables, and credential manager entries.
- Identify paths for privilege escalation: misconfigured services, writable paths in SYSTEM-owned directories, unquoted service paths, and token impersonation opportunities.
- Attempt lateral movement to adjacent hosts using harvested credentials, pass-the-hash, or Kerberos ticket attacks where the environment is Active Directory-joined.
- Map the network from the inside: identify segmentation boundaries, trust relationships, and any direct paths toward domain controllers or critical assets.
- Establish persistence only if explicitly required by scope, and document it clearly for remediation teams.
- Clean up temporary files, test accounts, or artefacts created during the engagement before moving to reporting.
A single compromised workstation with local admin rights can become a gateway to the entire domain. Post-exploitation proves exactly how far that path extends.
Phase 5: Reporting
A pentest report is the primary deliverable: it translates technical findings into business risk and actionable remediation steps. A poorly written report undermines even the most thorough technical work.
- Structure the report with an executive summary (non-technical risk overview) and a technical findings section (each vulnerability on its own page).
- Rate every finding using a consistent severity scale, such as CVSS v3.1, and explain the rating in plain language.
- Include reproduction steps for every finding: scope, tool used, command or payload, and observed output.
- Attach screenshots and raw output as evidence, labelled clearly with timestamps.
- Provide specific, prioritised remediation recommendations, not generic advice like “patch your systems.”
- Include an attack path narrative: describe how a chain of lower-severity findings together enabled full domain compromise, if applicable.
- Review the report for accuracy before delivery; verify that every finding described in the report was actually demonstrated during the engagement.
CVSS v3.1 scores range from 0.0 (None) to 10.0 (Critical), giving clients and remediation teams a universally recognised severity framework.
How This Checklist Helps With Pentest Certifications
Pentest certification exams are timed, high-pressure environments where a well-practised checklist is the single most effective tool a candidate can bring. Certifications such as OSCP, CPTS, PNPT, and CRTO all test whether you can move methodically through exactly these phases under exam conditions.
Following a reliable network pentest checklist during your lab practice builds the muscle memory needed to stay on track when the exam clock is running. At Cyber Services, with over 500 clients across 6 years, the most consistent observation from candidates who pass on the first attempt is disciplined phase adherence rather than raw technical skill.
If you are working toward an OSCP or similar credential, reviewing the OSCP service list and preparation resources available on the platform can help you align your practice methodology with real exam expectations.
Exam failures rarely come from not knowing an exploit. They come from skipping recon, missing an open port, or running out of time because there was no structured plan.
Frequently Asked Questions
What is the most important phase in a network pentest checklist?
Every phase depends on the one before it, but reconnaissance and enumeration are where most exam failures and real-world misses originate. Incomplete recon leads to overlooked attack surfaces. Spending enough time on these foundational phases saves hours during exploitation.
Can I use this checklist for OSCP or CPTS exam preparation?
Yes. The phases outlined here map directly to the methodology expected in both OSCP and CPTS exams. Practising each phase in HackTheBox or Offensive Security lab environments using this checklist helps build consistency under timed conditions.
How detailed should the exploitation documentation be during the exam?
Document every command, every output, and every screenshot with a timestamp as you go. Reconstructing evidence after the fact is unreliable. Exam reports that lack reproduction steps for a finding typically receive no credit for that finding, regardless of whether the access was achieved.
What is the difference between post-exploitation and lateral movement?
Post-exploitation refers to all actions taken after gaining initial access to a single host: privilege escalation, local enumeration, and persistence. Lateral movement is a subset of post-exploitation that specifically involves accessing additional hosts using credentials or techniques derived from the initial compromise.
Did you like this article?
Everything you just read is available on our site-tools, resources, and updates are delivered directly to you. Click the “Buy Now” button on the homepage to get full access today.