You spent the last several hours in the trenches. You rooted the boxes, watched shells pop, dumped proof.txt and local.txt into your notes. Then the exam clock rolls into the 24-hour reporting window, you open a blank document, and a colder panic sets in. Here is the reality no one tells you loudly enough: OffSec never watched your terminal. No grader saw your live session. The single artifact anyone evaluates is the report — and a technically flawless attempt still fails if that write-up is disorganized, missing proof screenshots, or impossible to reproduce. Per OffSec’s PEN-200 reporting requirements, every graded target needs both screenshots and written descriptions of the attack and its result. Miss either and points evaporate. A proven OSCP report template removes the formatting guesswork so your documentation time goes into accuracy, not fighting page margins at 3 a.m. This walks you through exactly what graders score, the anatomy of a passing write-up, the format choices that matter, and an exam-night checklist you can run before you hit submit.
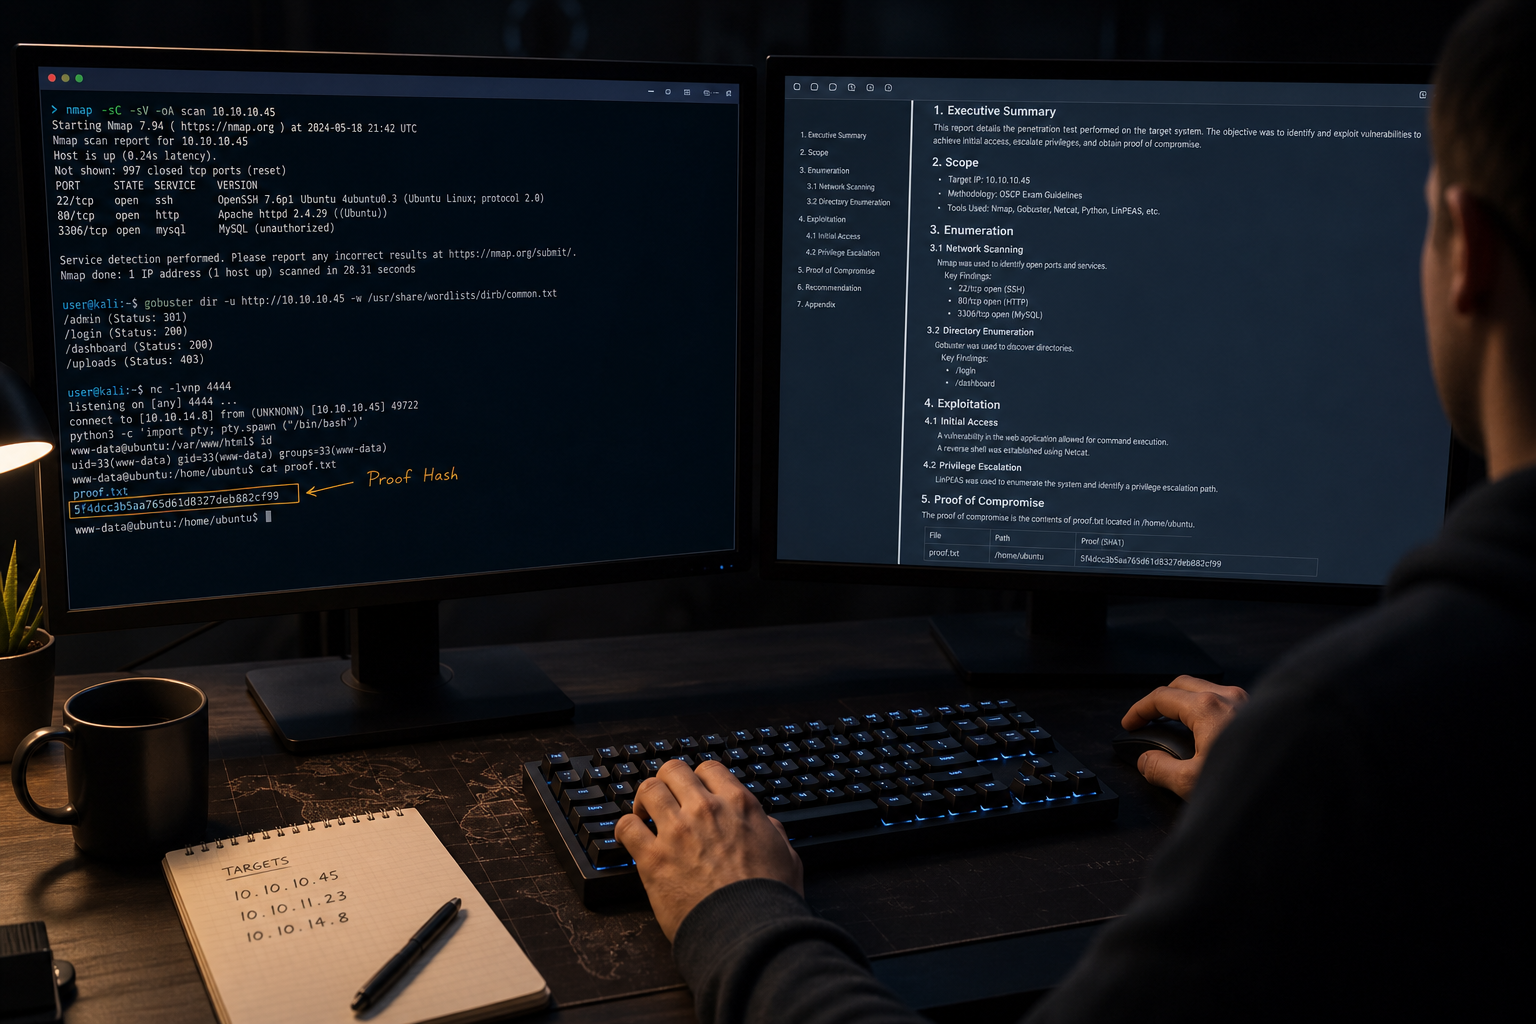
Table of Contents
- What OffSec Actually Grades When Your Terminal Goes Dark
- Anatomy of a Passing OSCP Report Template, Section by Section
- Markdown vs. Word vs. Prebuilt: Choosing Your Report Workflow
- Documenting a Compromise So a Grader Can Replay It
- The Screenshot and Evidence Mistakes That Quietly Cost Points
- Using a Prebuilt OSCP Report Template Without Crossing the Line
- Your Exam-Night Submission Checklist
- OSCP Report Template FAQ
What OffSec Actually Grades When Your Terminal Goes Dark
The exam machines test your skill. The report tests your ability to prove it. Those are two different exams, and candidates fail the second one all the time while passing the first.
Start with the primary sources, because everything else is downstream of them. According to the OffSec PEN-200 reporting requirements, OSCP+ exam reports must include both screenshots and written descriptions of attacks and their results for the graded targets. That is not a stylistic suggestion — it is an evidence-based grading standard. A screenshot with no narrative is half a submission. A narrative with no screenshot is the other half. Graders score what they can see and verify, nothing more.
The packaging rules are equally concrete. Per the OffSec OSCP Exam Guide, the report is the deliverable: a single PDF, archived into a .7z, with all scripts and proofs-of-concept included as text, not binaries. Get any of those wrong and you have created friction between yourself and a passing grade before the grader has read a single finding.
Now the part that stings. Candidates who clearly owned their boxes still fail, and the reasons repeat:
- Missing
local.txt/proof.txtscreenshots. No proof capture means no points, even if you rooted the machine cleanly. The grade follows the evidence, not your memory. - Privilege-escalation steps documented too vaguely to reproduce. “Escalated to root via kernel exploit” tells a grader nothing they can replay.
- Commands shown without output, or output shown without the command that produced it. The cause-and-effect chain breaks and the finding becomes unverifiable.
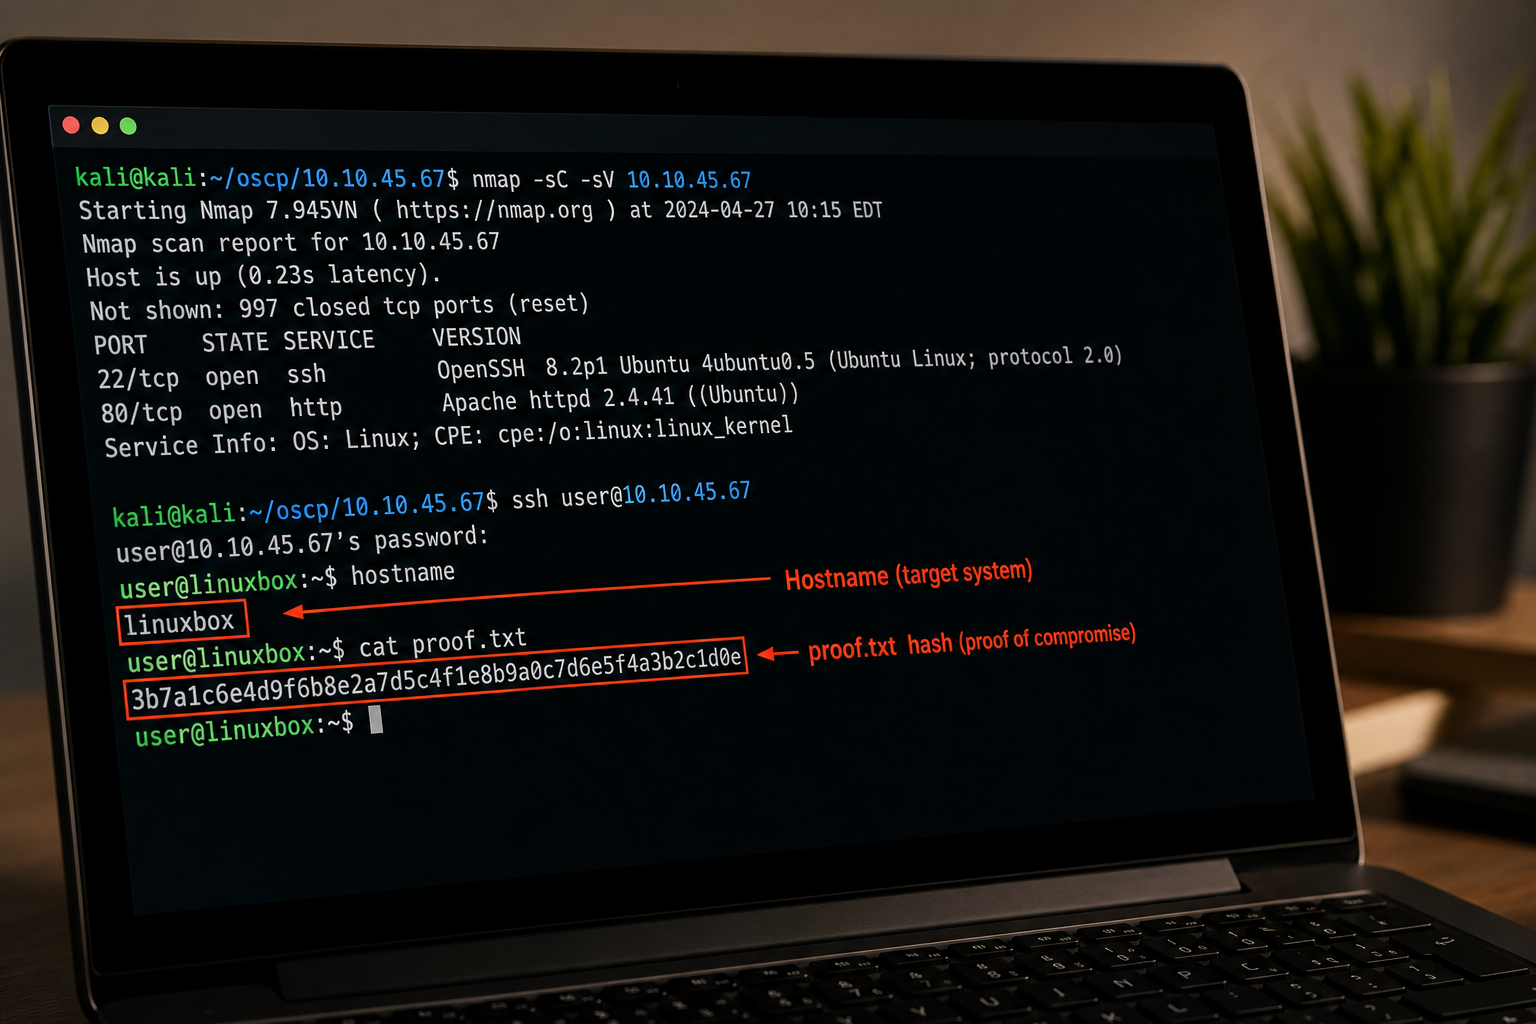
- No IP or hostname context. A proof hash floating in isolation doesn’t prove which box you compromised.
A Schellman penetration-testing specialist frames the standard well: each exploited machine should be documented as if you are explaining it to someone with minimal context — detailed enough that another practitioner could replicate the compromise end-to-end without extra guidance. That is the bar. Not “did I understand this in the moment,” but “can a stranger follow my exact path to the same result.”
OSCP educator c0nd4 pushes the same principle harder, advising candidates to be very verbose: document every file transfer, every hosted HTTP server, every discovered file. The logic is defensive. You cannot lose points for a detail you included; you can absolutely lose them for one you skipped.
The machines test your skill. The report is the only thing OffSec ever actually sees.
Here is the distinction that separates a pass from a fail. A notes dump is a pile of commands you understood while your adrenaline was up. A professional report is a reproducible narrative a stranger can follow cold. Graders reward the second and quietly punish the first. This is exactly where a structured OSCP report template earns its keep — it forces the narrative structure that raw notes never have, so you are documenting a compromise instead of transcribing chaos. When you are careful about documenting commands and methodology throughout your penetration testing workflow, the report writes itself in half the time.
Community discussions among OSCP candidates reflect real anxiety here — a recurring worry that grading feels unforgiving, that even a detailed report can fail over a single omitted screenshot. That fear is rational. But the fix is not luck. It is structure applied consistently, from the first nmap scan to the final .7z.
Anatomy of a Passing OSCP Report Template, Section by Section
A passing OSCP report template is not one person’s opinion of good structure — it is the convergence of several independent standards. The community noraj/chvancooten Markdown template specifies four core sections: a high-level summary with recommendations, a methodology walkthrough, per-finding walkthroughs with screenshots and proof.txt, and additional items. According to the PCI Security Standards Council Penetration Testing Guidance v1.1, a professional penetration test report carries at least five sections: executive summary, statement of scope, methodology, findings, and statement of limitations. And a reporting-platform provider’s Dradis Pro OSCP template shows exam reports routinely spanning eight or more major sections in practice.
The current format raises the floor further. A reporting-platform provider’s OSCP+ template requires distinct walkthroughs for three independent targets plus an Active Directory set of three machines — a minimum of six discrete host walkthrough sections in any passing report. Here is every component you need, and what a grader is actually checking for in each.
Cover Page & Candidate Info
Your OSCP ID, the exam date, and a contact block. Graders confirm your identity is bound to the attempt. It sounds trivial; a mismatched or missing ID is an avoidable stumble on page one.
Executive Summary & Recommendations
A high-level, non-technical outcome overview. PCI positions this section for stakeholders who never touch a terminal, so keep it in plain language. State what you were engaged to do, what you found, and what should change — no CVE strings, no shell syntax.
Methodology Walkthrough
Your overall approach across the network, not a per-box log. This is where you demonstrate methodology mastery rather than tool-clicking. Graders want to see that you have a repeatable process for approaching an unknown network, not that you got lucky with one exploit.
Information Gathering & Enumeration
Recon and service enumeration for each target, backed by evidence. Every meaningful nmap output belongs here, tied to the correct host. Enumeration is where most compromises are actually won, and skipping its documentation makes your later exploitation look like a guess.
Per-Host Penetration Findings
The heart of the report. One full walkthrough per target — three independent hosts plus the three-machine AD set, six minimum — each with commands, outputs, and proof.txt. This is the section graders spend the most time in, and it is where completeness converts directly into points. If you’re drilling the Active Directory attack chain, document the domain compromise as its own reproducible narrative, not a footnote.
Proof Screenshots
local.txt and proof.txt captures with the target IP and hostname visible in the same frame. A proof hash without host context is a hash a grader cannot attribute. Keep the whole window in shot.
Maintaining Access & House Cleaning
Persistence steps you took and any cleanup you performed. This demonstrates professional discipline — the difference between someone who popped a box and someone who understands the full lifecycle of an engagement.
Appendices / Additional Items
Scripts and PoCs as text, Metasploit and tool-usage tracking, and anything that clarifies the exploitation chain. Per OffSec’s packaging rules, code goes here as text, never as an attached binary.

Markdown vs. Word vs. Prebuilt: Choosing Your Report Workflow
The format you write in shapes how much time you spend fighting the document versus documenting the compromise. OffSec provides official templates in Word and org/HTML formats. Community templates from noraj and chvancooten are Markdown, which enables an automated export via Markdown plus Pandoc — a text-driven workflow that survives copy-paste and plays nicely with version control. A reporting-platform provider’s Dradis Pro generates reports from structured project data, while Markdown relies on manual entry plus external PDF conversion. A curated prebuilt template hands you a filled-out scaffold — pre-built AD walkthrough sections, a tool-usage appendix — so setup time collapses toward zero.
| Criterion | Blank Word Doc | Markdown + Pandoc | OffSec Official Template | Curated Prebuilt Template |
|---|---|---|---|---|
| Setup time | Highest (build from scratch) | Moderate (toolchain setup) | Low (download & fill) | Lowest (pre-structured) |
| Formatting control | Manual, error-prone | High, code-driven | Standardized | Standardized + pre-styled |
| Screenshot handling | Manual embed | Linked/embedded via markup | Manual embed | Guided placeholders |
| Learning curve | Familiar GUI | Requires Pandoc/CLI comfort | Familiar | Minimal |
| PDF/.7z export | Manual export | Automated pipeline | Manual export | Guided export |
| AD & tool-tracking sections | Build yourself | Build yourself | Generic | Pre-included |
The right choice depends on who you are on exam night. The first-timer benefits from an official Word template’s familiarity — no CLI surprises, no Pandoc dependency to debug under pressure — but risks disappearing down formatting rabbit holes, wrestling with image placement and table breaks when that energy should go into findings. The time-crunched working professional gains most from a curated prebuilt template, because it eliminates every structure decision before the exam even starts; the section headers, the six host walkthroughs, and the appendix are already there waiting to be filled.
The automation-minded operator — often the same person juggling multiple advanced certs and comfortable with a full red team tooling arsenal — will favor Markdown plus Pandoc for repeatable, version-controlled exports they can regenerate with one command. That workflow pays off across many reports, not just one exam.
Whatever you pick, the exam-night constraint is identical: the document must export cleanly to a single PDF, then archive into a .7z. A gorgeous Markdown source that renders broken images in the final PDF is a failing report. Test your export pipeline before exam day, not during it.
The best template is the one you never have to think about at 3 a.m. on exam night.
Documenting a Compromise So a Grader Can Replay It
Reproducibility is not a vibe — it is an ordered workflow you run on every box. The Schellman multi-stage benchmark moves through recon, enumeration, exploitation proof, and privilege escalation, capturing evidence at each stage. HTB and OffSec community advice reinforces it: include every nmap screenshot and describe your methodology for approaching each target. Layer on c0nd4’s verbosity principle — every file transfer, every hosted HTTP server, every discovered file gets logged — and you have a process that leaves a grader nothing to guess about.
Run these seven steps on each host, populating your OSCP report template‘s per-host section as you go:
- Capture the command. Copy the exact command you ran, character for character. Never paraphrase from memory — a mistyped command in the report is a finding a grader cannot reproduce.
- Capture the output. Pair every command with its raw output so the cause-and-effect is visible. The output is your proof that the command did what you claim.
- Annotate the “why.” One line explaining what this step achieved and why you ran it. This proves methodology, not luck, and it is what separates a walkthrough from a transcript.
- Screenshot proof with context. Get
proof.txtorlocal.txtvisible alongside the target IP and hostname in the same frame. One screenshot, all three elements. - Log the privilege-escalation path. Record every enumeration finding that led to root or SYSTEM, in the order you discovered it. A grader should be able to walk your exact path upward.
- Record file transfers and hosted services. Every uploaded tool, every hosted HTTP server, every discovered file — per c0nd4’s verbosity standard. These details often carry the full exploitation chain.
- Drop it into the per-host template section immediately. Populate the report as you work, not after. The 24-hour window is for polish, not reconstruction — and reconstruction from memory is where proofs go missing.
If your enumeration methodology feels shaky, structured walkthrough practice builds the muscle memory to document compromises cleanly the first time.
The Screenshot and Evidence Mistakes That Quietly Cost Points
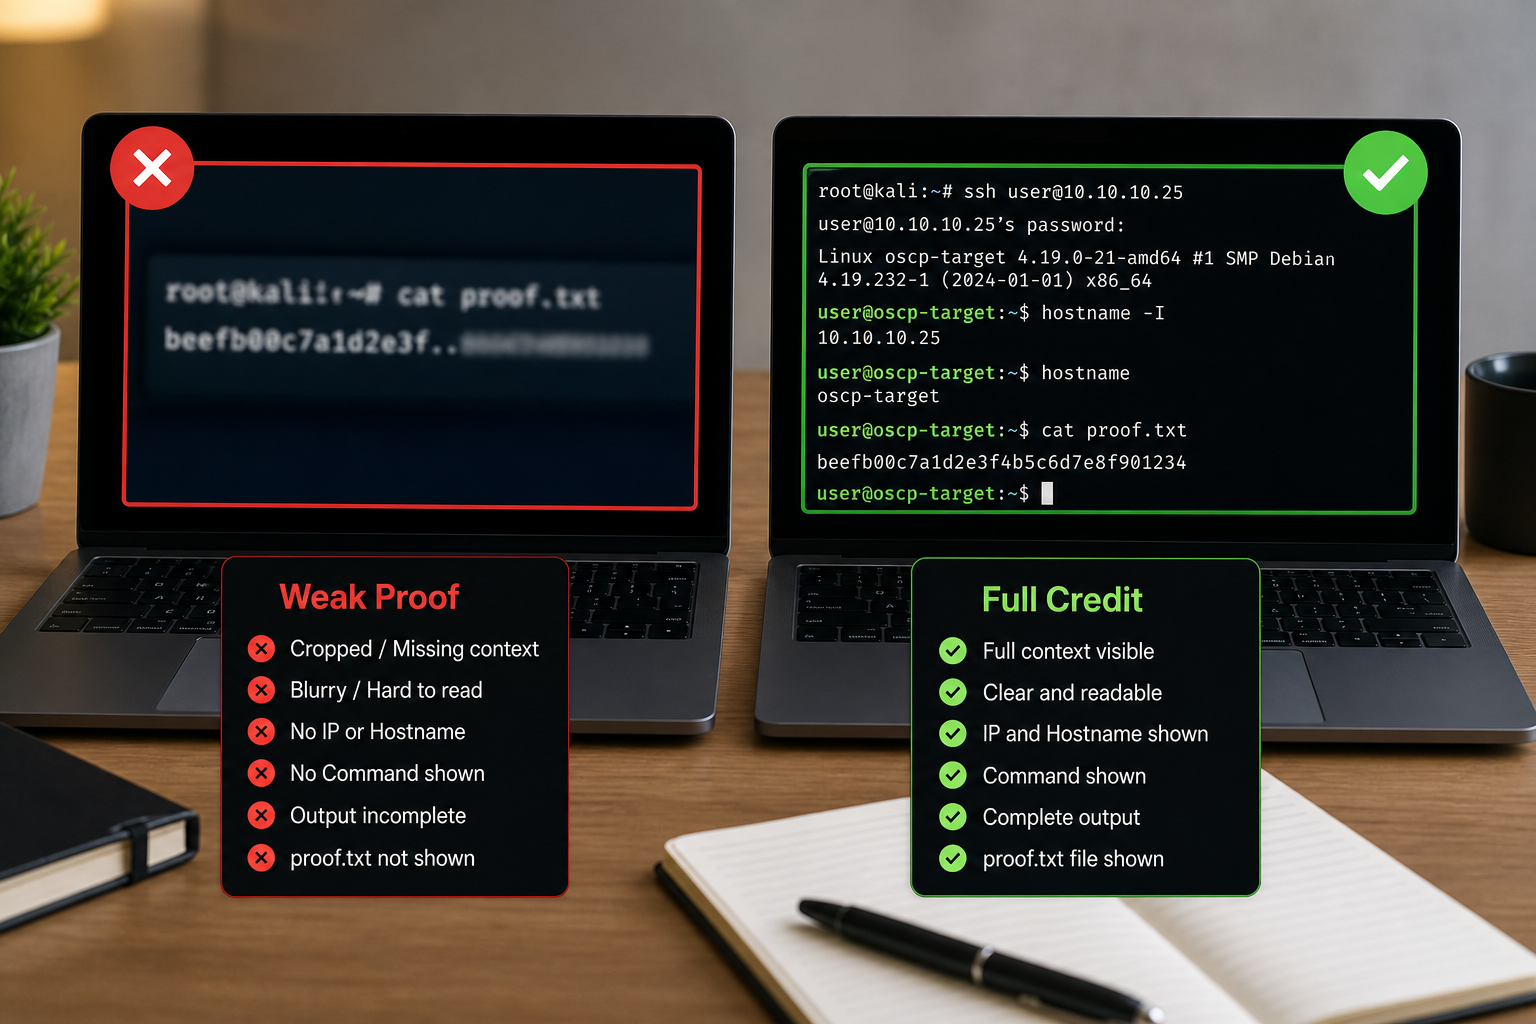
The OffSec PEN-200 baseline is fixed: screenshots plus written descriptions, every graded target. A Schellman specialist calls visual evidence one of the most important things to capture, advising screenshots at every significant stage. HTB and OffSec community guidance goes further, noting that additional screenshots “definitely cannot hurt” — which makes over-documentation the mathematically safe posture. These are the failures that quietly bleed points, with the losing version set against what earns full credit.
Unreadable / low-resolution screenshots
Loses points: a blurry terminal a grader physically cannot parse. Full credit: crisp, full-resolution captures with legible text at 100% zoom.
Missing IP/hostname context
Loses points: a proof hash with nothing proving it came from the right box. Full credit: IP and hostname visible in the same frame as proof.txt.
Cropped proofs
Loses points: a proof cut off at the edge or ambiguous about its source. Full credit: the full window showing command, output, and proof together in one shot.
Unlabeled findings
Loses points: screenshots with no caption tying them to a target or step. Full credit: each image captioned with its host and stage.
Command without output (or vice versa)
Loses points: a command with no result, so the grader can’t verify what happened. Full credit: paired command and output, every single time.
Skipped intermediate stages
Loses points: a jump from enumeration straight to root with no path shown. Full credit: recon, enumeration, exploitation, and privesc each evidenced in sequence.
Over-document. A screenshot you didn’t need never cost anyone a pass — a missing one has.
Using a Prebuilt OSCP Report Template Without Crossing the Line
This is where candidates get nervous, and where the rules are actually clearer than the rumors suggest. Per the OffSec OSCP Exam Guide, candidates should use one of the provided report templates when possible, but may submit their own template so long as it is structured, professional, and adheres to every reporting requirement. Read that carefully. A report template — a structural, formatting scaffold — is explicitly permitted and even encouraged. You fill it with your own findings, your own commands, your own proof.
The bright line is simple once you name both sides of it. A template is structure. Exam answers, shared findings, or leaked machine solutions are fraud — prohibited, and grounds for disqualification. Those are not adjacent categories that blur into each other. One is a document skeleton; the other is cheating. A legitimate curated template supplies pre-built section headers, an AD walkthrough scaffold, a tool-usage appendix, and clean export settings. It does not supply a single exploitation answer. The moment a “template” hands you the compromise itself, it stopped being a template and became something OffSec will fail and ban you for.
The value of a legitimate scaffold is time, and time is where reports quietly go wrong. Candidates routinely lose two to three hours to formatting, PDF and .7z packaging, and building out section structure — hours spent fighting the document instead of documenting the compromise. A curated scaffold reclaims that time so your effort goes into accuracy and reproducibility, which is precisely where points are won. The noraj/chvancooten framing captures the spirit: the report exists to demonstrate methodology mastery. A scaffold that frees you to show that mastery, rather than burning your window on margins, is working with the exam’s intent, not against it.
This is the honest position on a curated OSCP report template as a legitimate head start: professionally formatted, aligned to the current OSCP+ six-host structure, and ready to export straight to a single PDF and .7z. Cyber Services positions its templates in exactly that lane — a structural accelerator for your professional write-up, not a bank of exam answers. The scaffold speeds up the documentation. You still own every finding inside it, every command you ran, every hash you captured. Nobody can hand you the compromise. They can only hand you the container you pour your own work into — and that container, built right, is the difference between a passing report and a frantic all-nighter rebuilding structure you should never have had to build.
Your Exam-Night Submission Checklist
Before the timer hits zero, walk this list top to bottom with your OSCP report template populated:
- All six targets documented — three independent hosts plus the three-machine AD set, each with a full walkthrough.
- Every
proof.txt/local.txtcaptured — with the IP and hostname visible in each screenshot. - Commands paired with outputs — no orphaned command or output anywhere in the report.
- Privilege-escalation paths reproducible — a stranger could replay each root or SYSTEM from your steps alone.
- Executive summary written — a plain-language, non-technical outcome overview is present.
- Methodology section complete — your overall approach documented, not just per-host steps.
- Scripts and PoCs included as text — not binaries, per OffSec packaging rules.
- Exports cleanly to a single PDF — no broken images, no cut-off tables, no rendering surprises.
- PDF archived into a
.7z— matching OffSec’s required delivery format. - Filename matches OffSec’s naming convention and the report is submitted before the deadline — double-check both before you upload.
A rooted box you can’t prove on paper is a box you didn’t root, as far as the grade is concerned.
OSCP Report Template FAQ
Does OffSec provide an official OSCP report template?
Yes. The OSCP Exam Guide provides templates in Word and org/HTML formats and encourages candidates to use one when possible. It also permits your own template, provided it is structured, professional, and compliant with every reporting requirement. A curated OSCP report template builds on that same baseline with a pre-filled OSCP+ structure, saving you the setup work.
Can I lose points for report formatting even if all machines are rooted?
Yes, and it happens regularly. Grading is evidence-based — OffSec’s PEN-200 requirements call for both screenshots and written descriptions on every graded target. If the evidence is missing, unclear, or unverifiable, points come off regardless of how cleanly you owned the box in your terminal. The grade follows the report, not the session.
Is using a prebuilt report template allowed under OffSec exam rules?
Yes, for structure. The OSCP Exam Guide explicitly allows candidates to submit their own template as long as it meets the reporting requirements. What you may not do is share or use exam answers, leaked findings, or machine solutions — that is prohibited fraud. A prebuilt OSCP report template is a scaffold you fill with your own work, not a shortcut around doing the work.
What file format and packaging does OffSec require for submission?
A single PDF, archived into a .7z file, with all scripts and proofs-of-concept included as text rather than binaries. Confirm your export produces exactly that before the deadline — a broken package is an avoidable way to complicate an otherwise passing report.