
You’ve landed a shell. The foothold is clean, the callback is stable, and now you’re staring at a Linux prompt with www-data privileges — and you’re bleeding minutes flipping between ten browser tabs, an old writeup, and a half-remembered blog post trying to recall the exact find SUID one-liner. You know the technique exists. You’ve used it a dozen times. But right now, under a ticking exam clock or a client engagement window, the syntax won’t surface. That gap — between knowing a technique exists and reaching the exact command in two seconds — is where a pentest cheat sheet earns its keep.
The difference between a mid-tier tester and a fast one is rarely raw knowledge. It’s a curated, personal quick-reference that turns “I know there’s a command for this” into a copy-paste-and-adapt reflex. A real penetration testing cheat sheet is a working reference of commands, payload patterns, and methodology — the thing pros keep open in a split terminal, not a shortcut around learning, and explicitly not exam answer keys. Mature teams keep tool-focused references precisely because engagements reward speed and repeatability. Less time-on-task. Fewer command mistakes. Cleaner notes that become cleaner reports. That’s the whole value proposition, and this article builds it from enumeration through reporting.
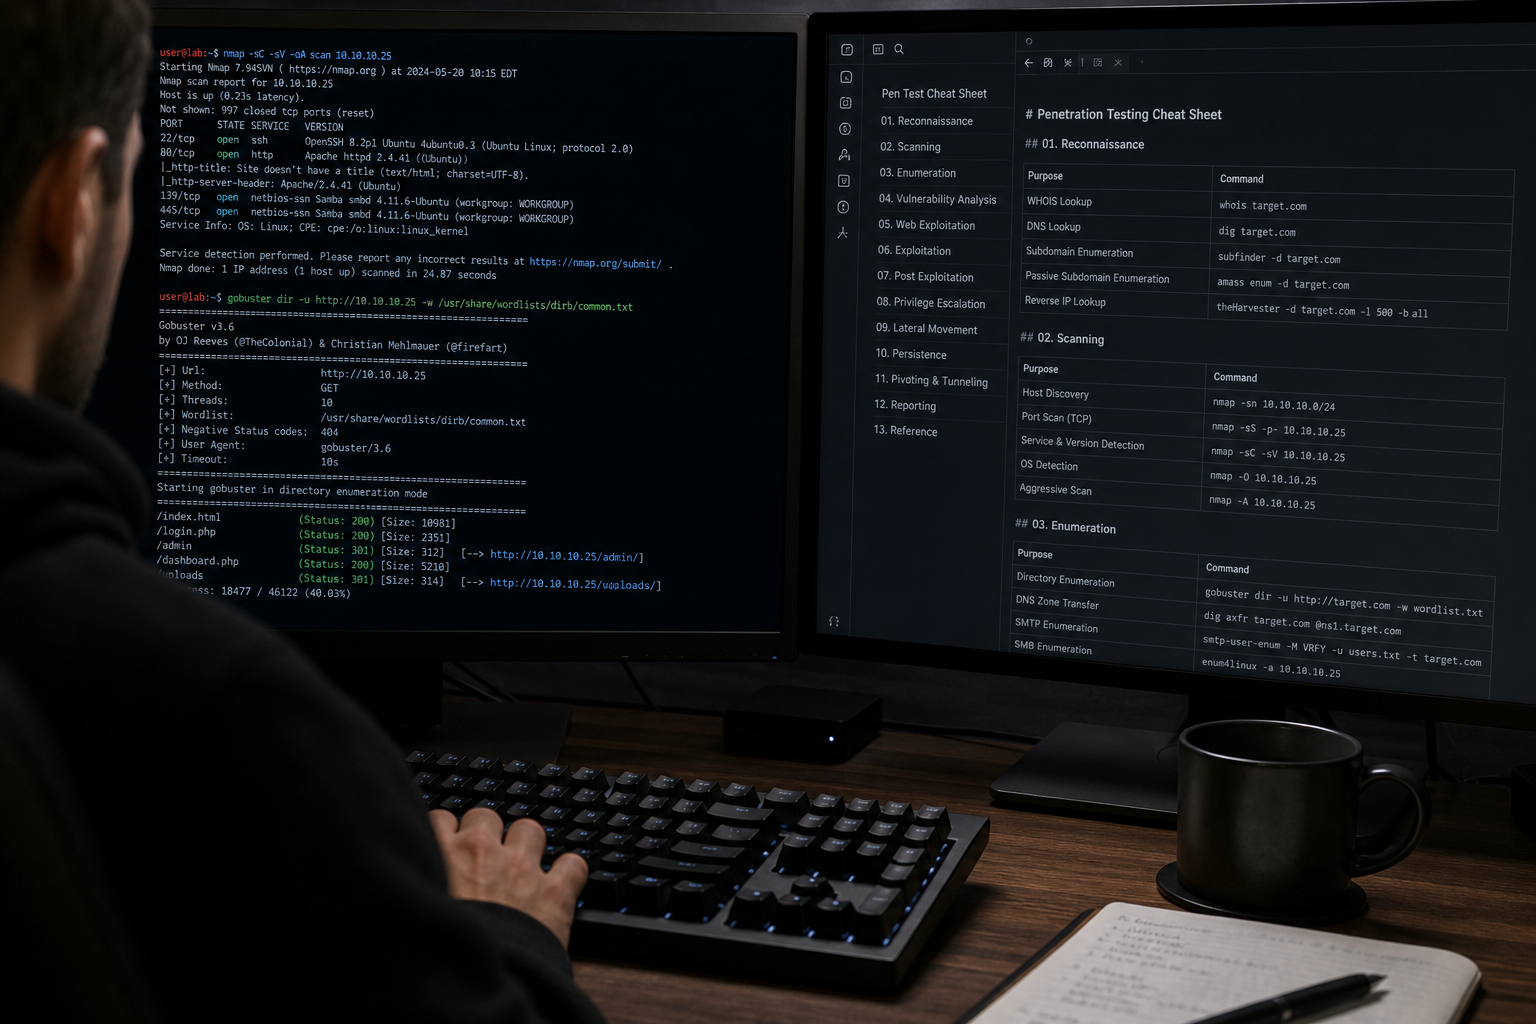
Table of Contents
- How to Actually Use a Cheat Sheet (and Why Memorization Is the Wrong Goal)
- Enumeration Commands Worth Keeping One Keystroke Away
- Privilege Escalation Quick Reference: Linux vs. Windows
- Web Exploitation Syntax You’ll Reach For Repeatedly
- Turning Raw Command Output Into a Report Clients Trust
- Building Your Own Cheat Sheet That Beats Any Download
How to Actually Use a Cheat Sheet (and Why Memorization Is the Wrong Goal)
Reset your mental model before you build anything. A cheat sheet is an operational asset, not a crutch. Penetration testing means juggling OS commands, tool-specific flags, and protocol nuances across Linux and Windows at the same time. When you’re mid-engagement, working memory is the bottleneck — not intelligence, not experience. A structured pentest cheat sheet improves both efficiency and accuracy, because you’re not misremembering a flag under pressure and burning a scan cycle on a typo. Public references like the SANS cheat sheet library, HighOnCoffee, and ired.team are deliberately formatted for quick reference during live work. That formatting choice — dense, categorized, command-first — is the entire point. They’re not tutorials. They’re field manuals.
Reference beats memorization, and it isn’t close. You do not need to memorize every one of Nmap’s 100-plus flags or every SQL injection payload variant. The actual skill is understanding why and when to reach for each one. A tester who knows that -Pn skips host discovery — and knows the network is dropping ICMP, so that flag matters right now — is more valuable than someone who can recite the full man page but freezes on which switch to use. Experienced testers say this openly in community discussions: they keep personal text files, CherryTree or Obsidian notebooks, and private Git repos of reused commands rather than trusting recall. Working memory is finite. Offload the retrieval so your cognitive bandwidth goes to decision-making and adaptation — the parts a machine can’t do for you.
Then integrate the reference into how you actually work. Keep it open in a split terminal or a pinned note during every engagement, not buried in a folder you open once a month. Treat it as a living document: every time a command saves you real time, add it with a one-line “when to use” note attached. That note is what turns a raw command into a capability six months later when you’ve forgotten the context. And battle-test the sheet in labs first. Prove every entry against authorized targets — the same way you’d approach OSCP-style lab practice — so that nothing on your sheet is unproven when a real client engagement starts. The families of commands you’ll find in curated offensive security cheat sheets are organized this way on purpose: grouped by what you’re trying to accomplish, not by which tool happens to do it.
The distinction that separates operators from note-hoarders is discipline about pruning. A cheat sheet stuffed with 300 commands you copied off a blog is nearly useless, because scrolling to find the one you need costs you the exact seconds you were trying to save. The best sheets are small, personal, and ruthlessly edited. Every command you keep should have earned its slot by saving you time on a real target — in a lab, in a CTF, in a scoped engagement. Everything else is noise you’ll scroll past when the clock is loudest.
Your skill is choosing and adapting commands under pressure — the cheat sheet simply frees your working memory to do it.
That mindset — reference over recall, curation over collection — is the foundation for everything that follows. The command sets below are a starting library. You’ll prune and extend them until they fit your hands.
Enumeration Commands Worth Keeping One Keystroke Away
This is the first heavy reference section. Every entry is a copy-paste-and-adapt template — not a canned exploit for a specific box. Read each command pattern as “here’s the shape; adjust the target, wordlist, and flags to your context.” The community reference at HighOnCoffee’s penetration testing tools cheat sheet covers many of these in more depth if you want to extend a category.

1. Network and Port Scanning (Nmap)
Nmap is where most engagements start, and where most time gets wasted on the wrong flags. Keep these patterns close:
# Full TCP service-detection scan for initial recon
nmap -sC -sV -p- -oA scan <ip>

# Fast triage — top 1000 ports, then go deep on what's open
nmap --top-ports 1000 -sV <ip>

# Skip host discovery when ICMP is blocked (very common)
nmap -Pn -sV -p- <ip>

# Aggressive: OS detection + version + default scripts + traceroute
nmap -A <ip>

# Stealthy "low and slow" for sensitive or monitored targets
nmap -sS -T2 --max-rate 50 -p- <ip>
The tradeoff is the thing to internalize. -A and -p- are loud and slow — they light up IDS and can take twenty minutes on a filtered host. --top-ports 1000 gets you a fast picture to act on while a full -p- runs in a second terminal. Know when speed matters and when stealth matters, because the same target rewards different scans. -Pn is the flag testers forget most often, and it’s the reason “the host is down” when the host is fine — it’s just not answering ping.
2. DNS and Service Enumeration
DNS misconfigurations hand you domain structure for free. Zone transfers still work more often than they should:
# Attempt a zone transfer (whole domain in one shot when misconfigured)
dig axfr @<nameserver> <domain>

# Quick record lookups
nslookup <domain>

# Subdomain and record discovery
dnsenum <domain>
dnsrecon -d <domain>

# Banner grabbing on an open port
nc -nv <ip> <port>

# HTTP header probe for server/framework fingerprinting
curl -I http://<ip>
A successful axfr can map an entire internal namespace in one command — worth trying first because it costs nothing. When it fails, dnsenum and dnsrecon grind through subdomains and record types to build the picture the hard way.
3. Web Directory and File Enumeration
Everything you find here feeds forward into exploitation. Admin panels, upload endpoints, and backup files discovered by directory busting become the targets for the web attacks in the next section.
# Directory brute-force with a sensible wordlist
gobuster dir -u http://<ip>/ -w /usr/share/wordlists/dirb/common.txt

# Extension-aware search
gobuster dir -u http://<ip>/ -w <wordlist> -x php,txt,html

# dirsearch — good default filtering out noise
dirsearch -u http://<ip>/ -e php,html,js

# Classic dirb pass
dirb http://<ip>/ /usr/share/wordlists/dirb/common.txt
Tune the wordlist to the target. A small or medium list keeps noise down and finishes fast on typical web roots; a giant list is for when the small one comes up empty and you have time to spend. Every path you log here is a candidate for LFI, file upload abuse, or authentication bypass later — so record findings as you go, not after.
4. SMB, LDAP, and Internal Services
Internal services leak more than most testers expect, especially on legacy Windows environments. This is the natural jumping-off point for structured Active Directory enumeration practice, where shares and null sessions frequently open the whole domain.
# Full enum4linux sweep — shares, users, groups, domain info
enum4linux -a <ip>

# List SMB shares with a null/anonymous session
smbclient -L //<ip>/ -N

# Connect to a specific share anonymously
smbclient //<ip>/<share> -N

# SNMP enumeration on misconfigured devices
snmpwalk -v2c -c public <ip>
enum4linux -a is the loud, thorough option — it can dump usernames, group memberships, and password policy in a single run when the target allows anonymous access. smbclient -L... -N is the quieter check for whether null sessions are even on the table. SNMP with the default public community string still exposes device configs and sometimes credentials on network gear nobody’s touched in years.
5. General OS and Host Enumeration
Once you have a shell, orient yourself before you escalate. These are the first commands you run on any host:
# --- Linux ---
id                 # current user, groups, uid/gid
whoami
sudo -l            # what can you run as root without a password?
ps aux             # running processes (look for root-owned services)
ss -tulpn          # listening sockets (modern netstat)

# --- Windows ---
whoami /priv       # token privileges — SeImpersonate is gold
whoami /groups
tasklist           # running processes
net user           # local accounts
net localgroup     # group membership
sudo -l on Linux and whoami /priv on Windows are the two highest-value single commands in this entire list — they frequently hand you the escalation path directly. This is the starting enumeration checklist, deliberately kept lean. Prune what you don’t use and extend it as your own reference grows against real targets.
Privilege Escalation Quick Reference: Linux vs. Windows
Privilege escalation is where a cheat sheet stops being a convenience and starts being a force multiplier. The checks below are a starting reference, not a full post-exploitation framework. Automation scripts like linPEAS and winPEAS systematize the discovery — but you still have to understand what the script is flagging, or you’ll stare at a wall of colored output and miss the one line that matters.
| Area | Linux Quick Checks | Windows Quick Checks |
|---|---|---|
| Current privileges | id, sudo -l |
whoami /priv, whoami /groups |
| Misconfigurations | SUID/SGID, writable cron | Unquoted svc paths, weak ACLs |
| Automation scripts | linPEAS, find+grep |
winPEAS, icacls, reg query |
| Credential hunting | Config files, SSH keys | Registry (VNC/PuTTY), saved RDP |
| OS/kernel leverage | Kernel ver → local exploit | Build + patch level → strategy |
Linux privilege escalation skews toward filesystem permissions and SUID abuse. The single most reached-for command is the SUID hunt:
# Find SUID binaries — the classic first check
find / -perm -4000 -type f 2>/dev/null

# World-writable directories and files
find / -writable -type d 2>/dev/null

# Check sudo rules
sudo -l
From there, the checklist runs through misconfigured cron jobs writing to world-writable paths, editable configuration files owned by root, weak sudo rules that let you run something exploitable, and the kernel version cross-referenced against known local exploits. linPEAS automates nearly all of this — but it flags dozens of items, and only understanding which ones are actually exploitable turns a finding into a root shell.
Windows privilege escalation skews toward service and registry misconfigurations instead. The high-value checks:
# Token privileges — SeImpersonate/SeAssignPrimaryToken enable potato attacks
whoami /priv

# AlwaysInstallElevated — install an MSI as SYSTEM if both keys are set to 1
reg query HKLMSoftwarePoliciesMicrosoftWindowsInstaller /v AlwaysInstallElevated
reg query HKCUSoftwarePoliciesMicrosoftWindowsInstaller /v AlwaysInstallElevated

# Check service binary permissions
icacls "C:PathToService.exe"
Unquoted service paths, weak service and folder ACLs, the AlwaysInstallElevated registry pair, and credentials sitting in the registry — stored VNC, PuTTY, and RDP secrets pulled with reg query — are the recurring wins. winPEAS automates the enumeration; icacls and reg query are your manual verification when you want to confirm what the script found before you act on it.
Give every entry on your priv-esc sheet a one-line “why this matters” note. whoami /priv means nothing until you know that SeImpersonate unlocks a potato-family attack to SYSTEM. That context is what separates a command from a capability, and it’s exactly the kind of depth you build through deeper red team tradecraft with Cobalt Strike once you move past single-host escalation.
Automation scripts find the paths fast — but only understanding what they flag turns a finding into an escalation.
Web Exploitation Syntax You’ll Reach For Repeatedly
Every payload below is a template requiring adaptation — WAFs, encoding, and framework behavior dictate what actually lands. Keep payload families on your sheet, not single strings, because the first thing a filter does is block the obvious one.

SQL Injection (SQLi) — Start with a manual boolean probe to confirm the injection point, then reach for automation to exploit it:
-- Boolean-based confirmation
' OR 1=1-- -

-- UNION column discovery (adjust column count)
' UNION SELECT NULL,NULL,NULL-- -
# sqlmap — automated confirmation and exploitation (where authorized)
sqlmap -u "http://<target>/page?id=1" --batch
sqlmap -u "http://<target>/login" --data "user=a&pass=b" --batch
sqlmap -u "http://<target>/page?id=1" --cookie "session=..." --dump
sqlmap -u "http://<target>/page?id=1" --os-shell   # only on authorized targets
The distinction that matters: manual payloads confirm the vulnerability and prove you understand it; sqlmap exploits it at scale. Know both, and know when to switch — a lot of testers reach for sqlmap first and never learn to recognize injection manually, which fails them the moment automation gets blocked.
Cross-Site Scripting (XSS) — Keep a family, because the naive test gets filtered instantly:
<!-- Minimal reflected test -->
<script>alert(1)</script>

<!-- Event-handler variant when <script> is stripped -->
<img src=x onerror=alert(1)>

<!-- Attribute-breakout variant -->
"><svg onload=alert(1)>
Reflected XSS fires in the response to your request. Stored XSS persists and hits other users — higher impact, worth flagging accordingly. DOM-based XSS never touches the server and lives entirely in client-side JavaScript. Keeping the reflected/stored/DOM distinction on your sheet reminds you to test all three surfaces instead of declaring “no XSS” after one bounced payload.
Server-Side Request Forgery (SSRF) — Probe for internal reach, then pivot to metadata:
http://localhost:8080/
http://127.0.0.1/admin
http://169.254.169.254/latest/meta-data/   # cloud metadata endpoint
SSRF’s value is what it reaches, not what it returns to you directly. The cloud metadata endpoint at 169.254.169.254 is the classic escalation — it can leak temporary credentials in misconfigured cloud environments. Manipulate host headers and URLs consistently through Burp or curl so you can replay and confirm every hit.
Local File Inclusion (LFI) — Traversal first, then wrappers when raw traversal is filtered:
../../../../etc/passwd

# PHP filter wrapper to read source without executing it
php://filter/convert.base64-encode/resource=index.php
LFI is where enumeration pays off directly: the paths and parameters your directory busting surfaced earlier are exactly the inputs you test here. A parameter that loads a template is a candidate for traversal; the php://filter wrapper lets you pull source code as base64 when the app blocks direct file reads. Adapt depth and encoding to the target — these are starting points, and context decides the rest. For structured practice against these exact classes of bug, Burp Suite–oriented labs remain the sharpest way to build the reflex.
Turning Raw Command Output Into a Report Clients Trust
A finding in your terminal is worth nothing until it’s a finding in your report. The cheat sheet’s real payoff isn’t speed on the box — it’s the consistency that makes writeups fast and defensible afterward. This is the legitimate, monetizable core of the whole workflow, and it’s where structured documentation separates a tester who gets rehired from one who doesn’t.
Use the cheat sheet as the backbone for how you capture notes, not just which commands you run. Every meaningful action gets recorded the same way: command, raw output, interpretation. Enforce one repeatable finding structure across the entire engagement — Finding → Evidence (command + output) → Impact → Recommended fix. That rigidity feels slow in the moment and saves hours at report time, because you’re never reconstructing what you did from memory at 2 a.m. the night before a deliverable is due. Consistency in capture is what makes writeups fast later, and the discipline traces directly back to a shared reference: when the whole team runs the same commands the same way, the notes line up.
Walk one concrete translation. Your Nmap scan returns an outdated service version — say, an old OpenSSH or an unpatched web server banner. On the box, that’s one line of -sV output. In the report, it becomes a named vulnerability with a CVE reference, a plainly stated business impact (“an unauthenticated attacker could achieve remote code execution, exposing customer data on this host”), and specific patch guidance (“upgrade to version X, or restrict the service to the management VLAN”). That movement — from terminal transcript to client-readable risk — is the actual product a client pays for. The command found it; the framing sold the fix.
Reproducibility is the third pillar, and the one that quietly builds trust. Consistent commands — driven by a shared cheat sheet — make every engagement step reproducible by a teammate and defensible in a later audit. When a client’s internal team asks “how did you find this,” you hand them the exact command and expected output, and they confirm it themselves. That repeatability increases the perceived rigor of your testing, which is what justifies your rate. This is also where the difference between technique families and one-off tricks shows up in your deliverables: training bodies like SANS structure their references around technique families rather than isolated commands, and reports built the same way read as methodical rather than lucky.
A finding isn’t real until it’s reproducible — the same command, the same output, defensible in any audit.
This is also the point where ready-to-use report templates and structured documentation stop being nice-to-haves. A finding structure you fill in the same way every time, backed by evidence you captured consistently, turns scattered terminal output into a deliverable a client trusts — and pays for. Cyber Services builds its reporting resources around exactly that gap between “I found the bug” and “here’s a document that proves it and tells you how to fix it.”
Building Your Own Cheat Sheet That Beats Any Download
No downloaded pentest cheat sheet will ever fit your hands as well as the one you build. A generic 200-line dump is someone else’s memory; a 30-line sheet you assembled from your own engagements is a capability. Here’s how to build one that actually earns its place in your split terminal.
1. Start from a solid template. Begin with reputable public references — the SANS lists, curated web pentesting sheets, community repositories — as scaffolding, not scripture. They give you the categories and the command shapes so you’re not starting from a blank file. The goal from day one is to adapt and prune, never to copy wholesale. A sheet you didn’t curate is a sheet you’ll scroll past under pressure.
2. Keep only what you use under pressure. After every engagement or lab session, do two things: add the commands that actually saved you time, and delete the ones you never reached for. A 12-command sheet you know cold beats a 200-line dump you have to scroll through every time. Ruthless editing is the discipline most people skip, and it’s the one that makes the difference between a reference and a graveyard of copied snippets.
3. Organize by workflow, not by tool. Group your sheet around phases — recon, enumeration, exploitation, post-exploitation, reporting — not “all Nmap flags in one block.” When you’re mid-engagement you think in objectives (“I need to escalate on this Windows host”), not in tools. Structuring the sheet the way you think mirrors how high-quality references are built: for engagement reality over academic completeness.
4. Add a “when to use” note to every entry. One line per command. nmap -Pn isn’t useful until the note reads “use when ICMP is blocked and the host looks down but isn’t.” That single line of context is the difference between a command and a capability, and it’s what your future self will thank you for six months from now when the memory of why is gone.
5. Choose a durable, versioned format. Pick something that survives and travels. A plain text file in a dotfiles repo is the minimalist’s choice. CherryTree or Obsidian notebooks give you structure and search. A private GitHub repo adds versioning and lets a team share and improve one sheet together. Working testers openly favor these formats in community discussions precisely because they’re durable, portable, and diffable — you can see how your reference evolved.
6. Battle-test in labs before client work. Prove every command against authorized lab targets before it touches a real engagement. Nothing on your sheet should be unproven when a client’s data is in scope — that’s the same rigor OSCP and CPTS lab prep demand, and it’s why lab access is a real investment rather than an optional extra. A command that “should work” is a liability; a command you’ve run to success ten times in a lab is a tool.
7. Keep it ethical — always. A cheat sheet is for skill application on authorized, scoped engagements. Full stop. Seasoned pentesters share command references openly in the community precisely because those references are for legitimate, authorized testing — never for exam fraud, never for unauthorized access. The reference accelerates a skill you actually possess and apply within bounds you’re allowed to test. That’s the line, and it doesn’t move.
A cheat sheet doesn’t make you a pentester — it makes a pentester faster.